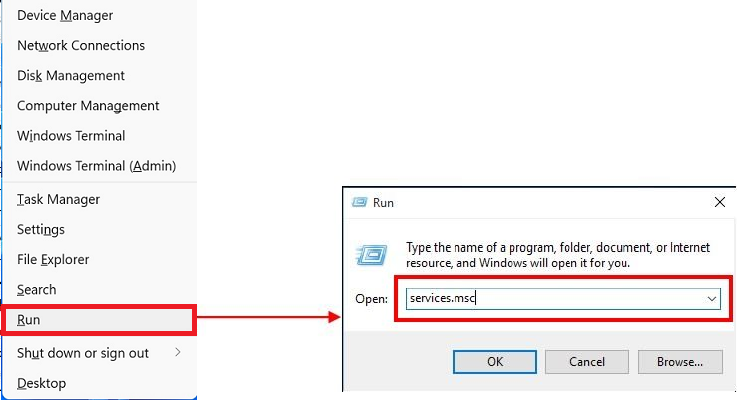
- Press Windows key
 + “X“ key on the keyboard and select “Run“, then type “services.msc“.
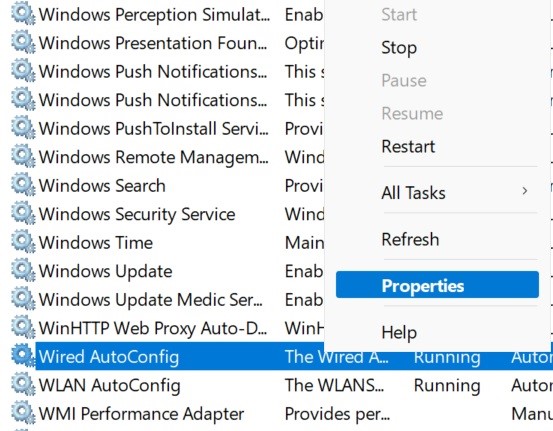
- Right click on “Wired AutoConfig“, and select “Properties“.
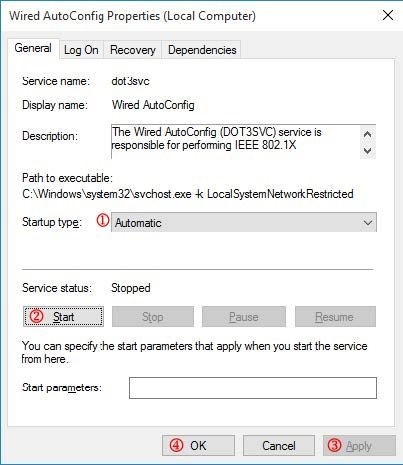
- Click the “General” tab and select the following settings:
- Set “Startup type” to “Automatic“.
- Click “Start” to start the service.
- Click “Apply“.
- Click “OK“.
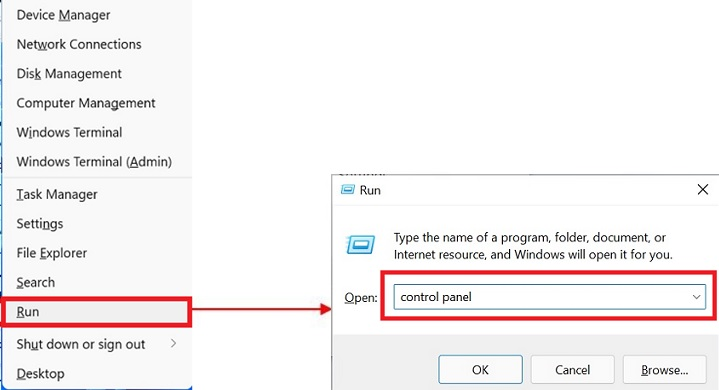
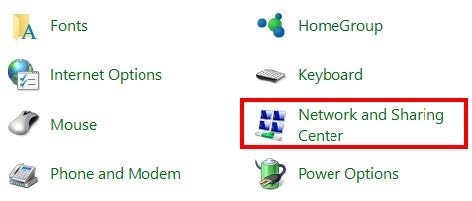
- Press Windows key + “X“ key on the keyboard and select “Run“, then type “control panel“.
- Click the “Network and Sharing Center“.
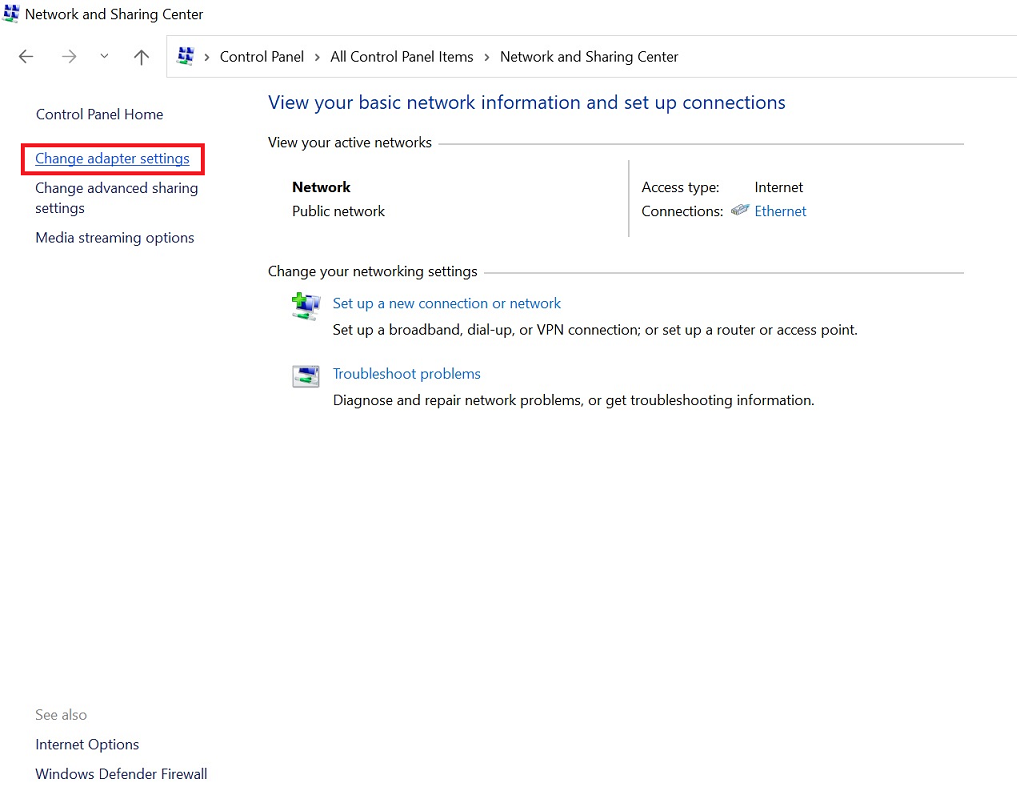
- Click “Change adapter settings” on the left hand side of the screen.
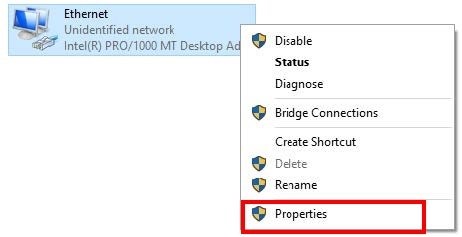
- Right click the “Ethernet” and select “Properties” for further configuration.
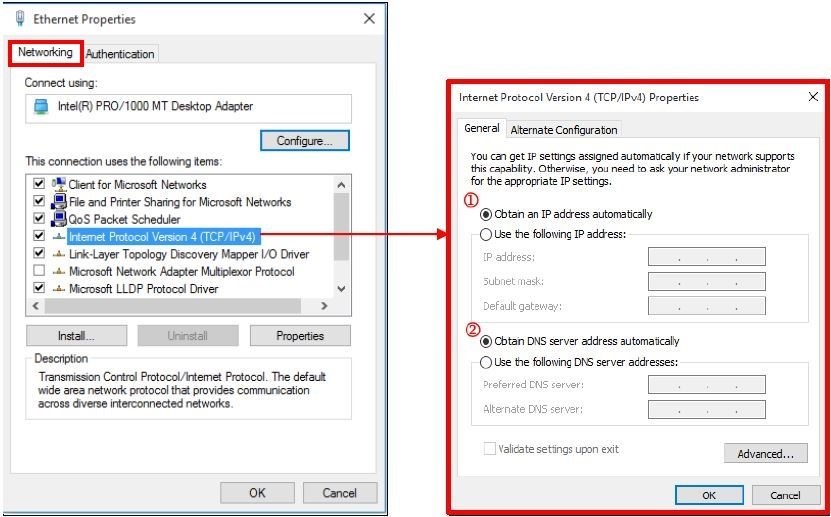
- Click the “Networking” tab and select the following settings:
- Double Click “Internet Protocol version 4 (TCP/IPv4)“.
- Select “Obtain an IP address automatically” and “Obtain DNS server address automatically“.
- Click “OK“.
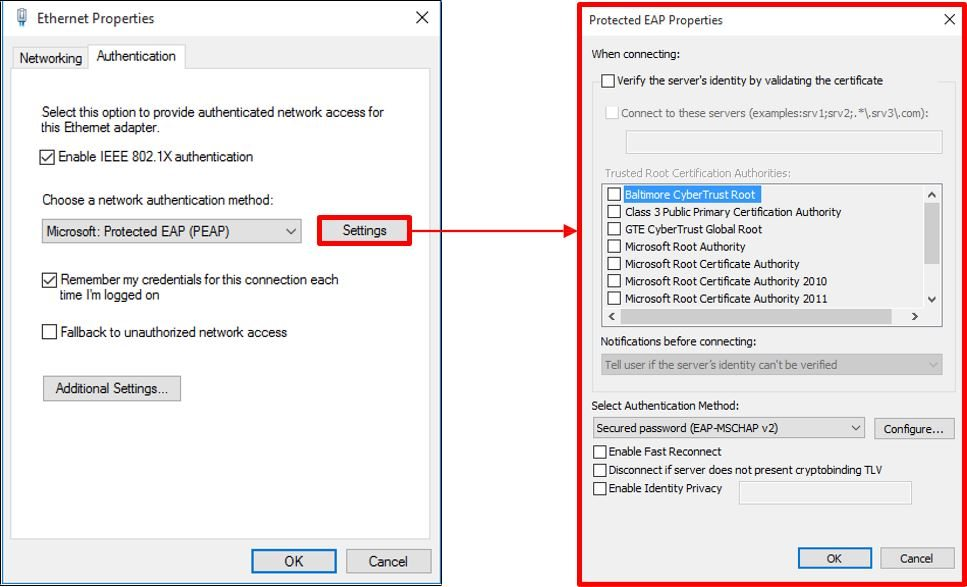
- Click the “Authentication” tab and select the following settings:
- Check “Enable IEEE 802.1X authentication“.
- Choose “Microsoft: Protected EAP (PEAP)“.
- Uncheck “Fallback to unauthorized network access“.
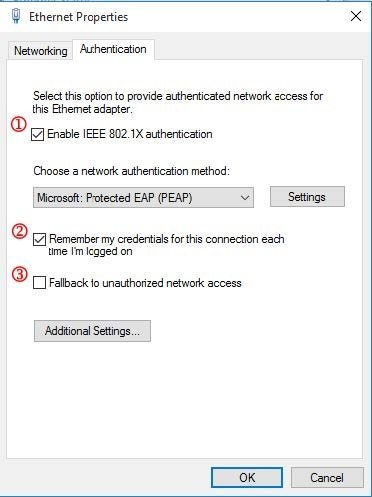
- Click “Settings” button. Uncheck all the settings as shown in the picture.
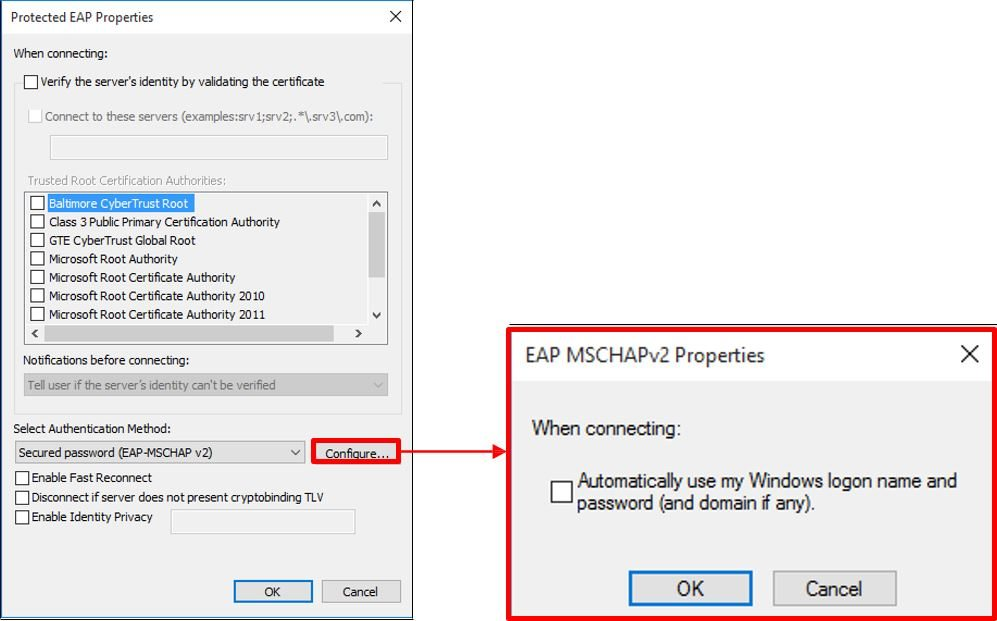
- Choose “Secured Password (EAP-MSCHAP v2)” in “Select Authentication Method“, and then click “Configure…“. Uncheck it and click “OK“.
- Click the “Authentication” tab and select the following settings:
- Click “Additional Settings…“.
- Check “Specify authentication mode” and choose “User authentication“.
- Uncheck “Enable single sign on for this network“.
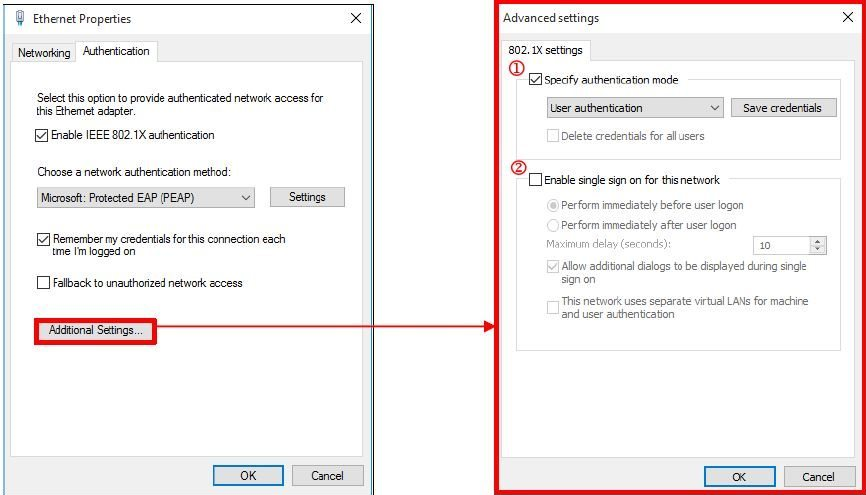
- Click “Save credentials” button and input your username and password.
The password is case sensitive and the user name is in lowercase.
If you are student, your user name contains only the first seven characters of your student ID, e.g. “ba12345”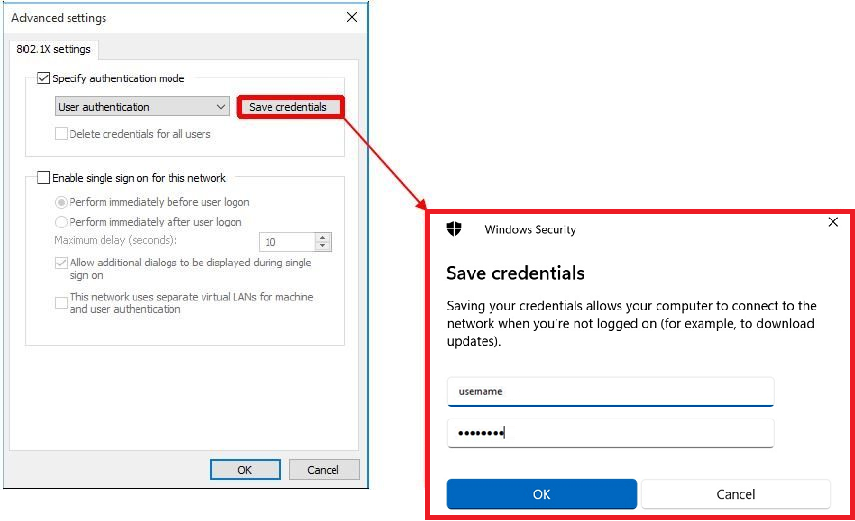
- Click “OK” and save your changes.