Windows 10 or above
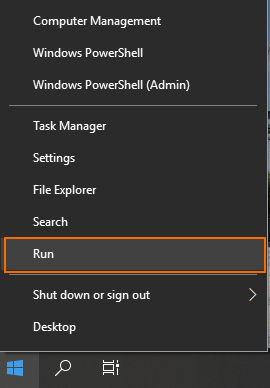
1. Right-click the “Start” button and click “Run” or use the hotkey combination Windows key + R.
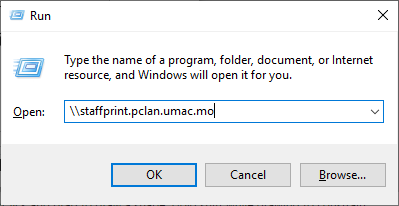
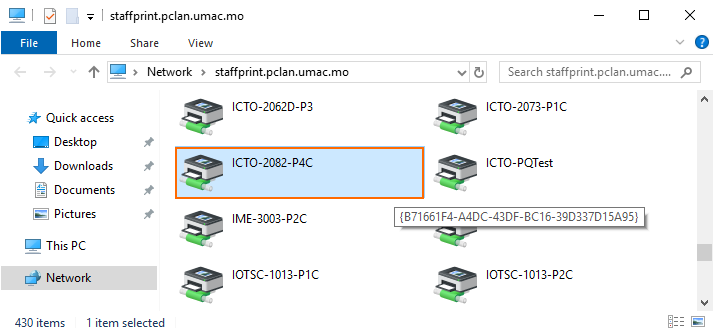
2. Type in \\staffprint.pclan.umac.mo and press “Enter“.
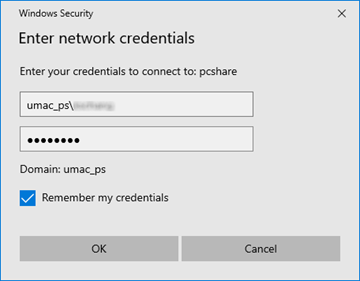
3. Windows will prompt for your UMPASS account name and password. Please fill in your credentials as follows:
Name: umac_ps\UMPASS Account
Password: UMPASS Password
4. Look through the list of printers for the appropriate one(s) for your department and location. When you find the network printer, double-click it.
Mac
| Canon Devices (Driver Type : PS) Download: Link |
| Ricoh Devices (Driver Type : PS) Download: Link |
| Fuji Xerox Devices (Driver Type : PS) Download: Link |
1. Choose “Apple” menu > “System Settings“, then click “Printers & Scanners“.
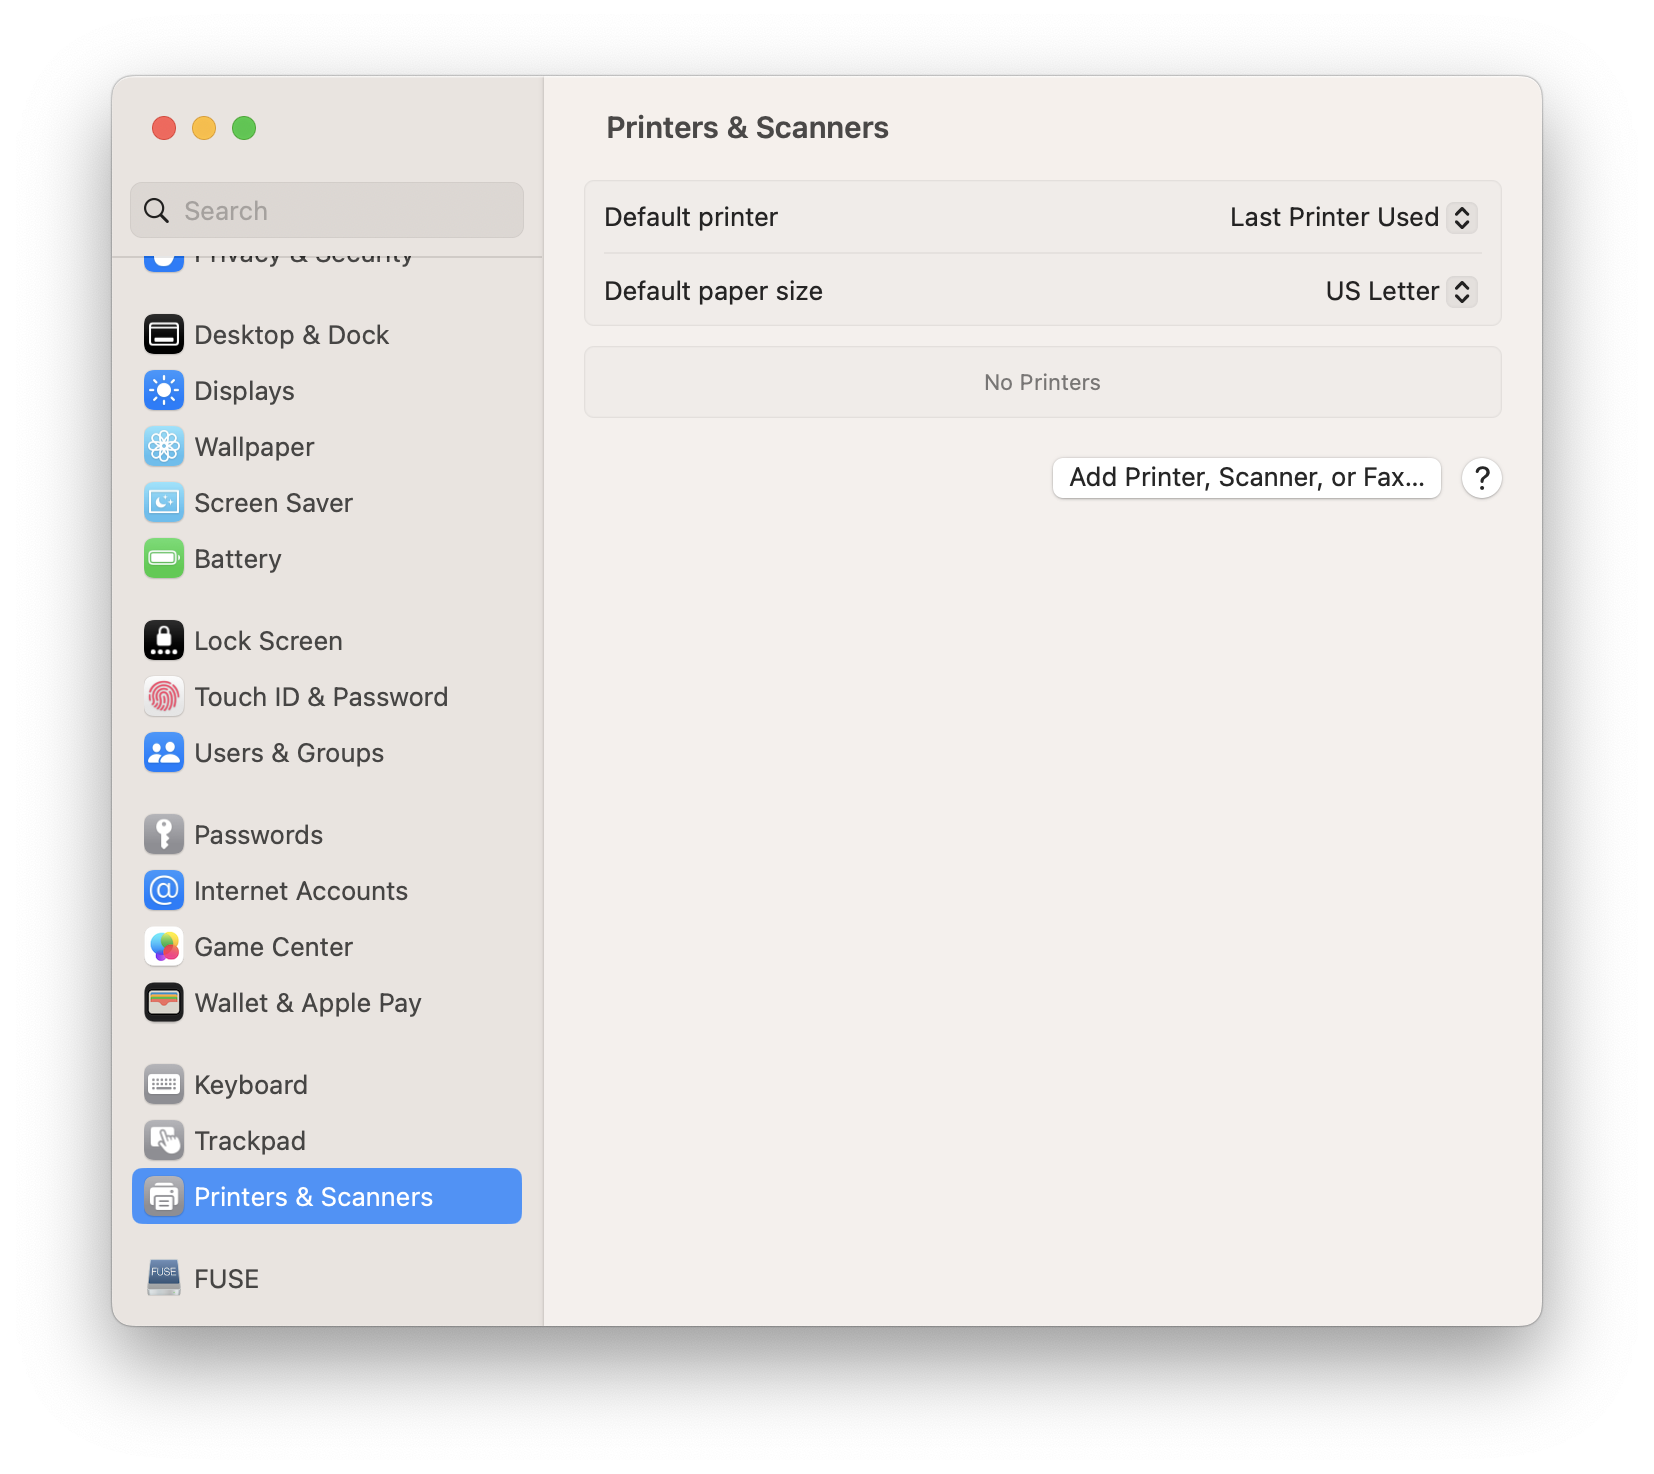
2. Click “Add Printer, Scanner, or Fax…” button of the “Printers & Scanners” pane to open the Add Printer window.
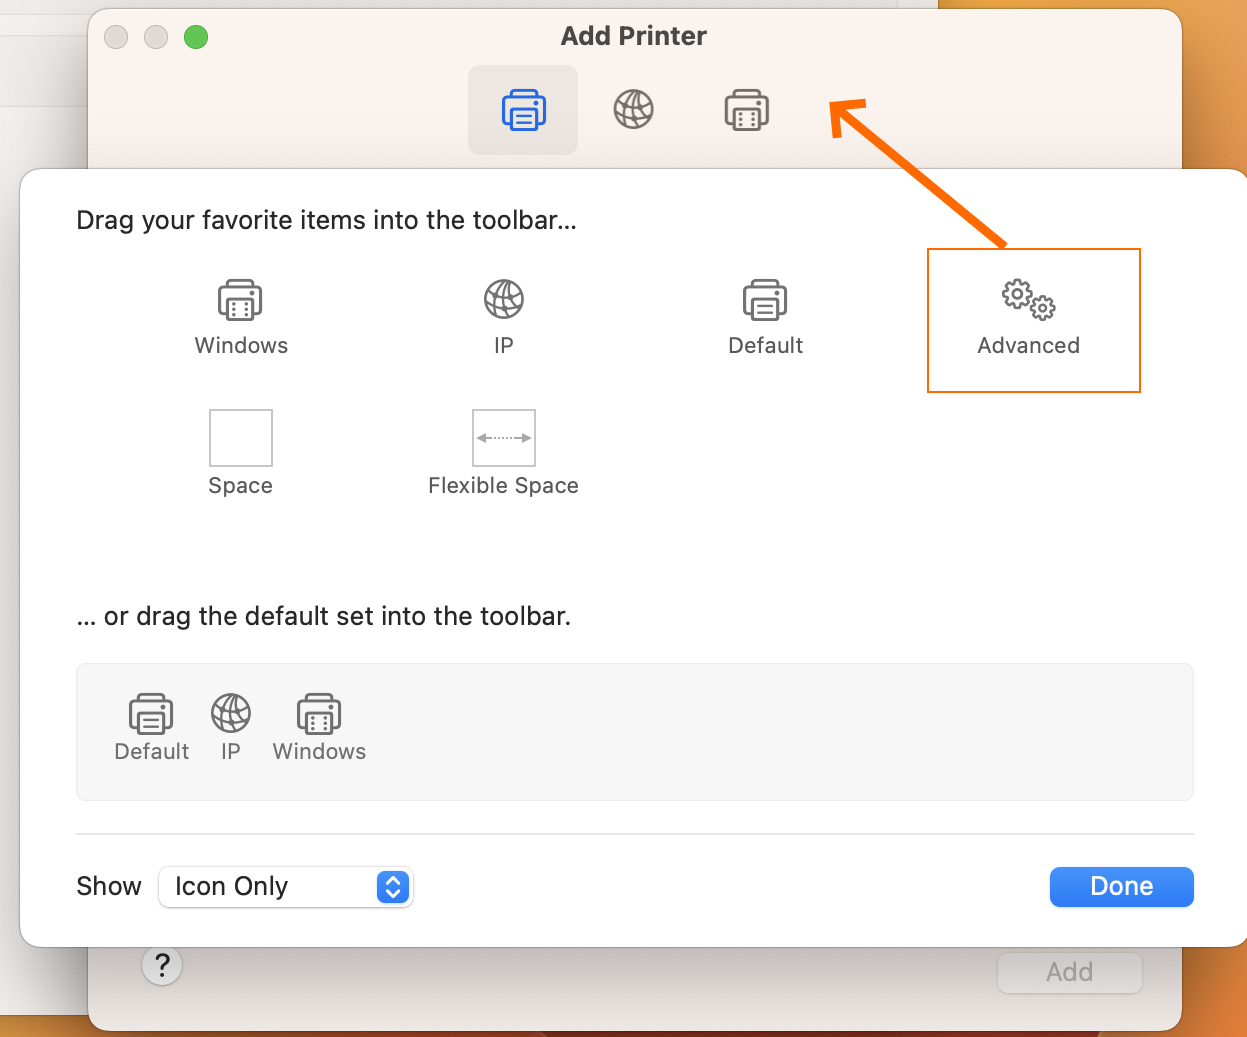
3. The Add Printer pane will open up.
[Note: If the “Advanced” icon is already available on the toolbar, proceed to step 5]
4. Move the cursor to a place on the toolbar without an icon, then right and choose “Customize Toolbar…”. Drag and drop “Advanced” icon onto toolbar and choose “Done”.
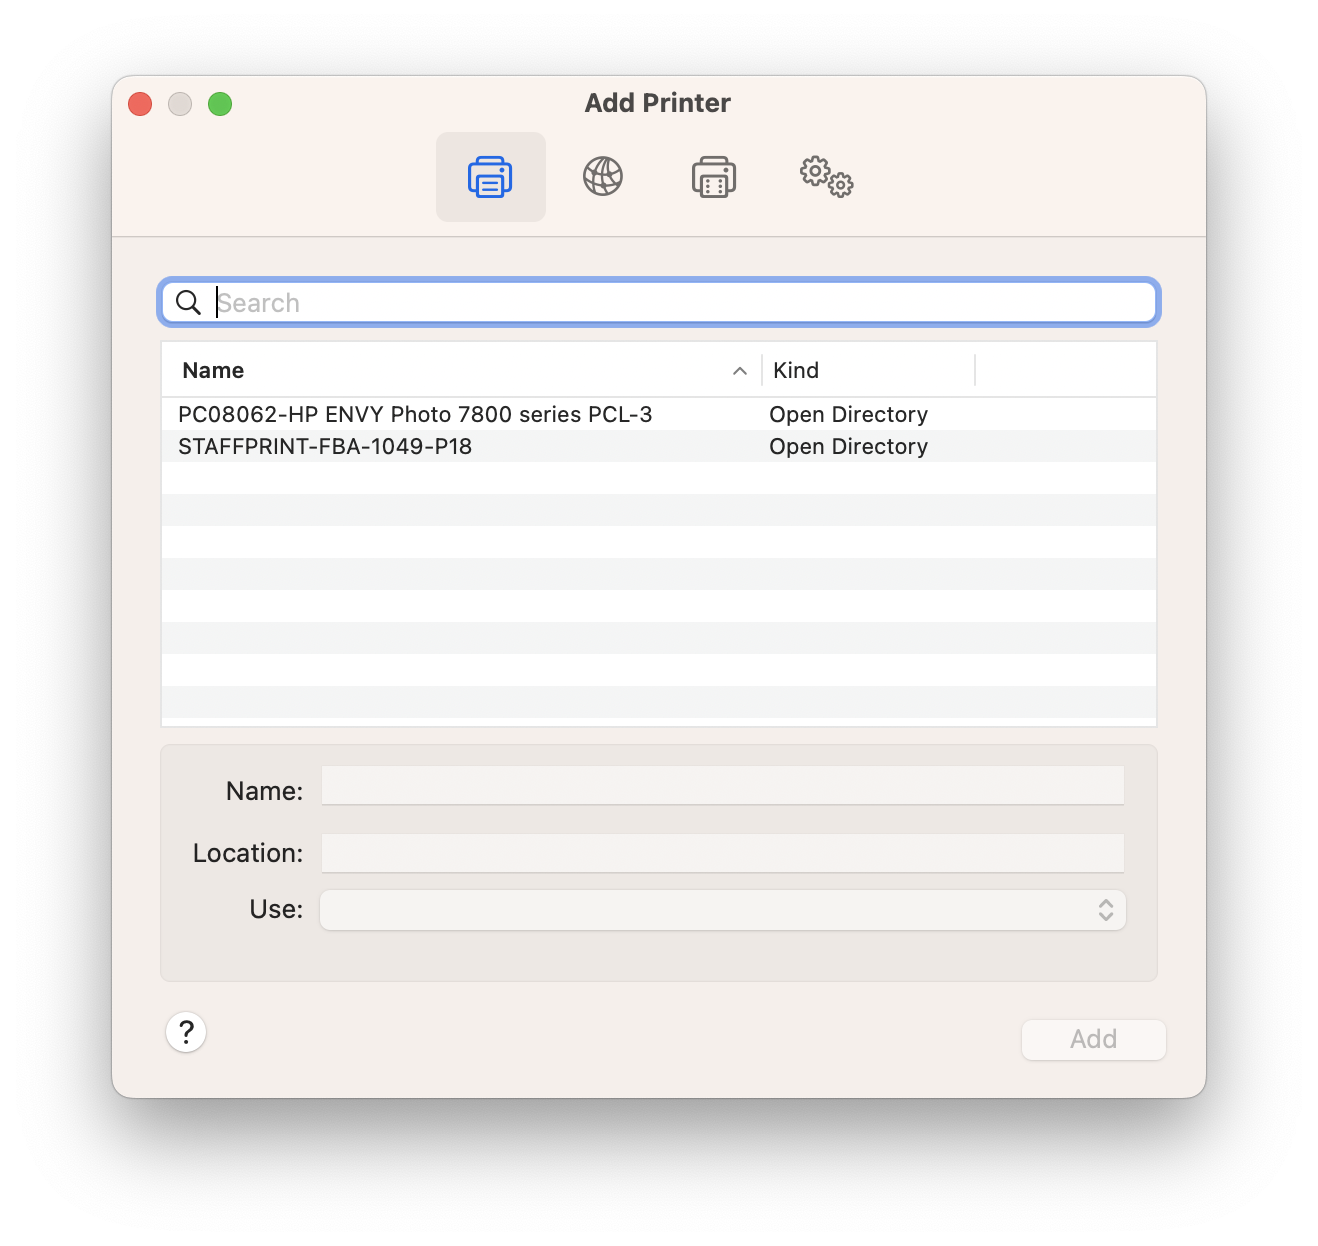
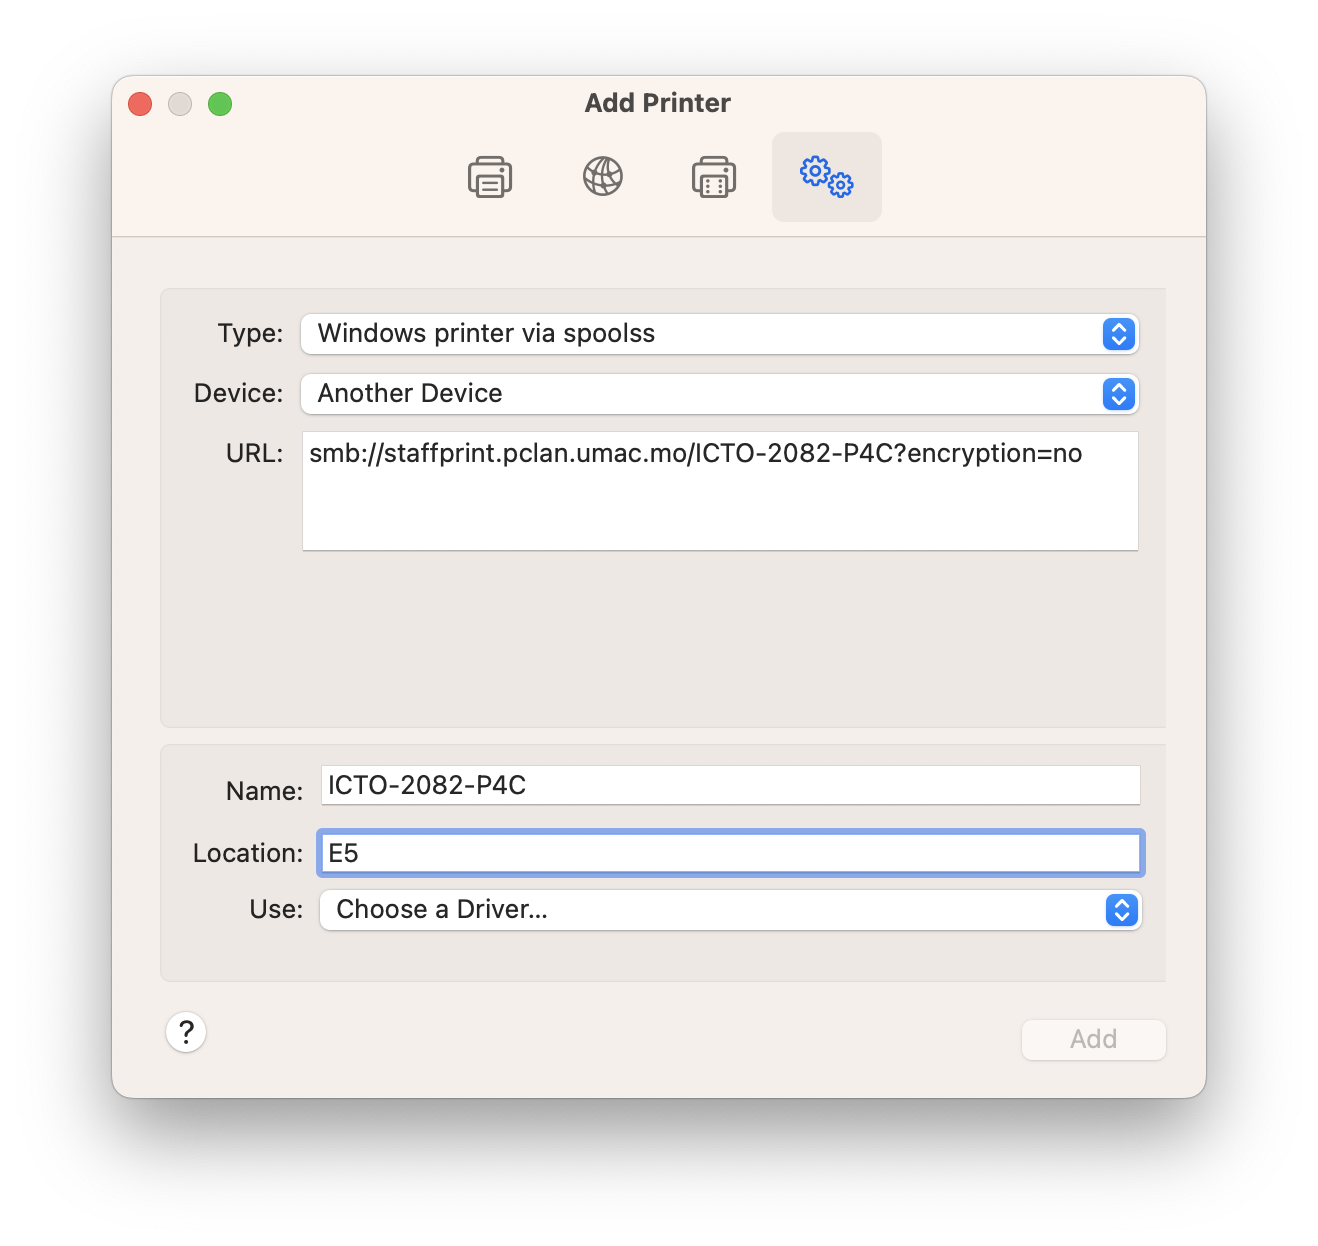
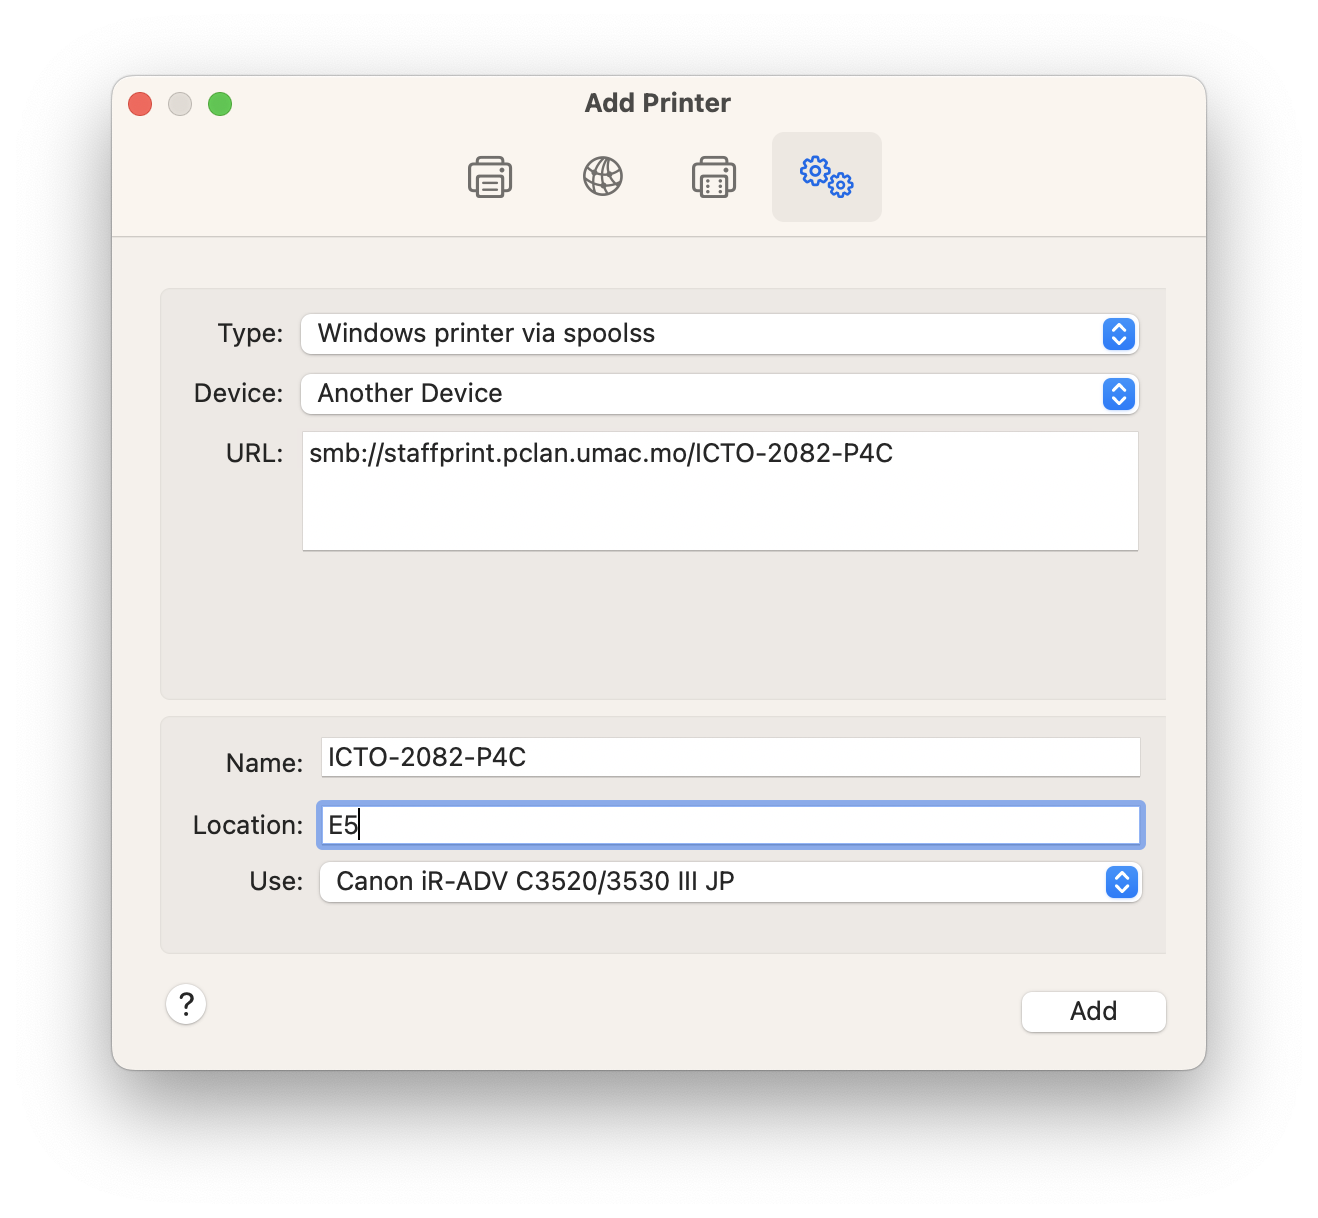
5. Click on the “Advanced” button and fill in the information as follows:
Type = “Windows printer via spoolss”
URL = smb://staffprint.pclan.umac.mo/print_queue_name
Name = print_queue_name (example: ICTO-2082-P4C)
Use = Choose the corresponding driver (Step 6)
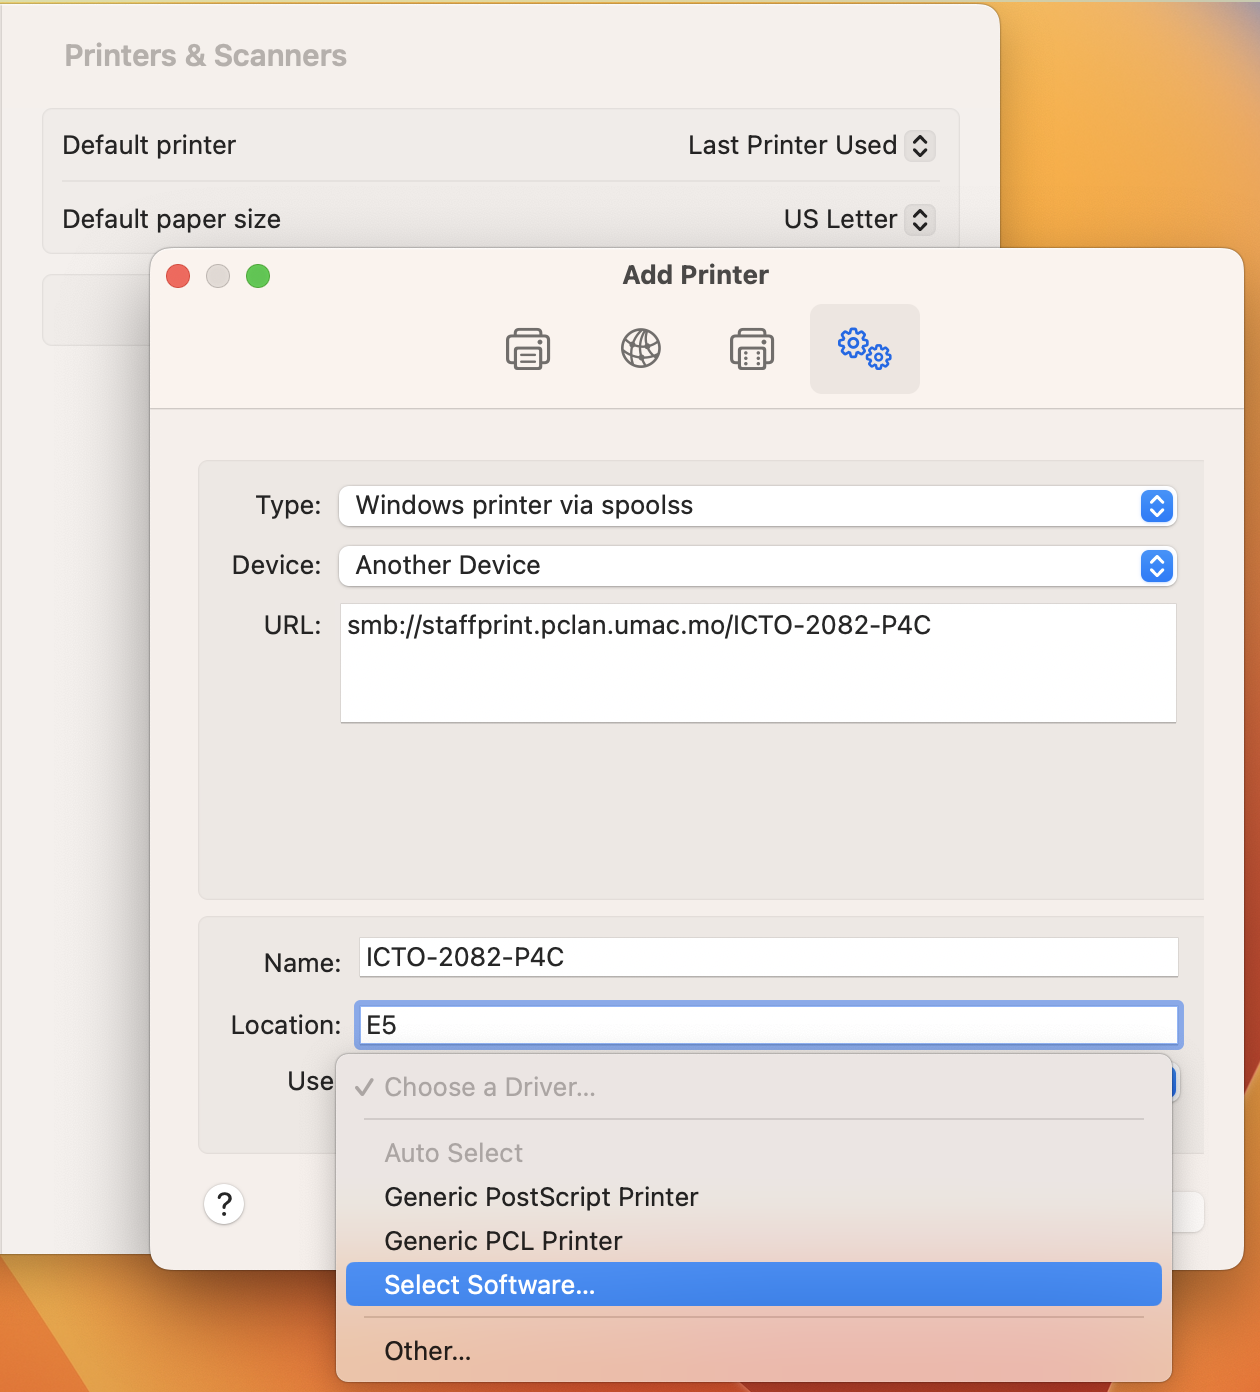
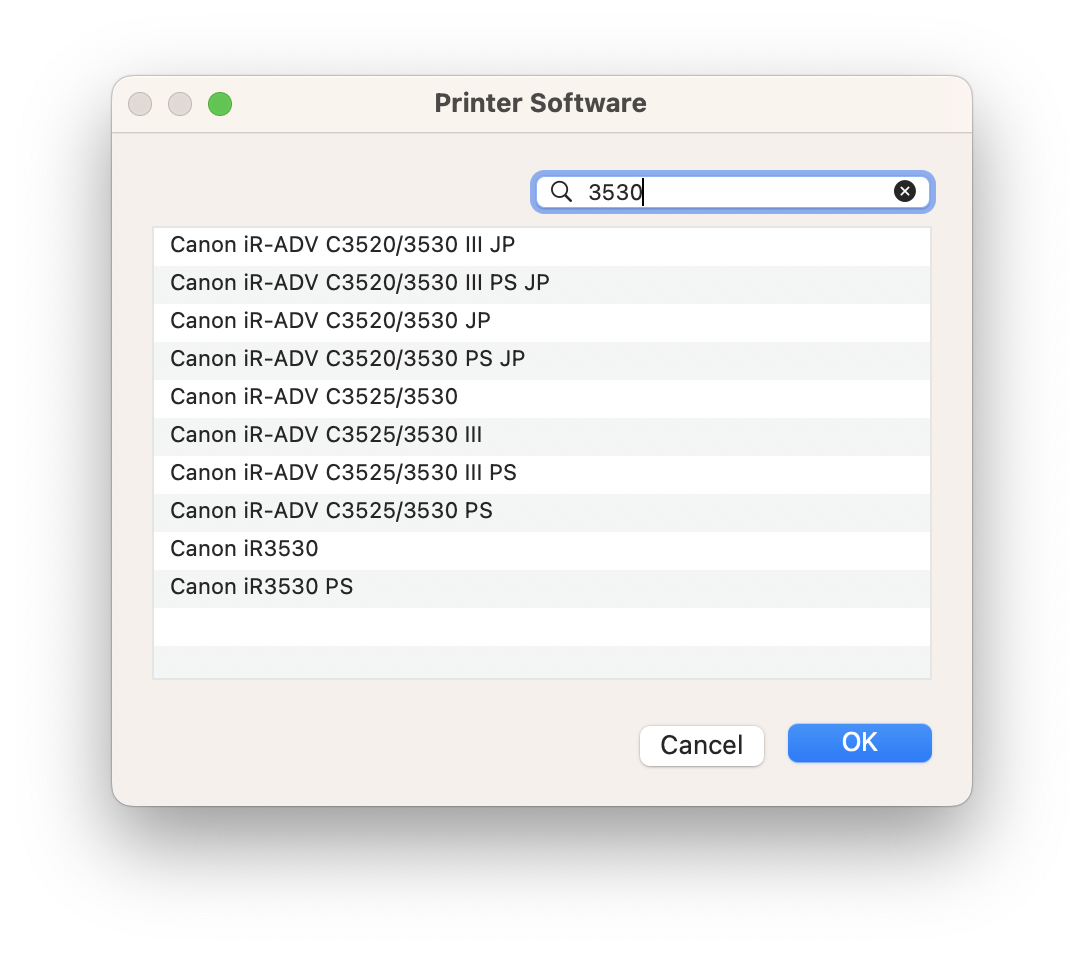
6. Choose driver for the network printer you want to connect.
a) For HP printer: Please select “Generic PCL Printer”.
b) For photocopier: Please select “Select Printer Software” and choose the corresponding driver for the printer you want to connect.
7. Print to the print queue in your application.
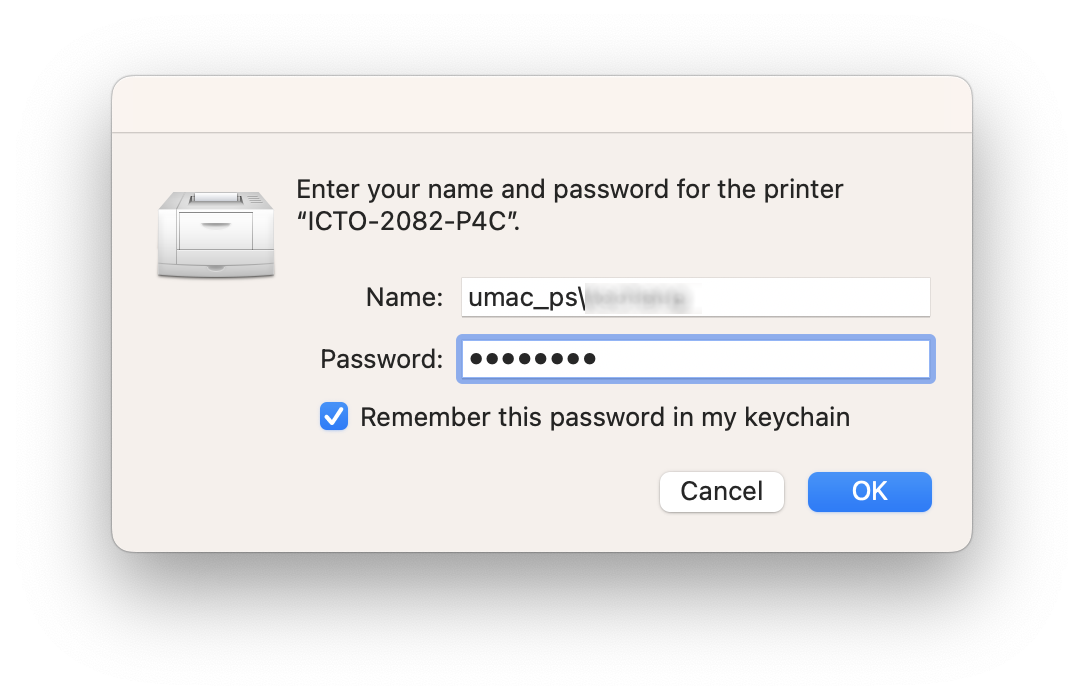
8. Mac will prompt for your UMPASS account name and password. Please fill in your credentials as follows:
Name: umac_ps\UMPASS Account
Password: UMPASS Password
[Note: You can choose “Remember this password in my keychain” option for future use.]
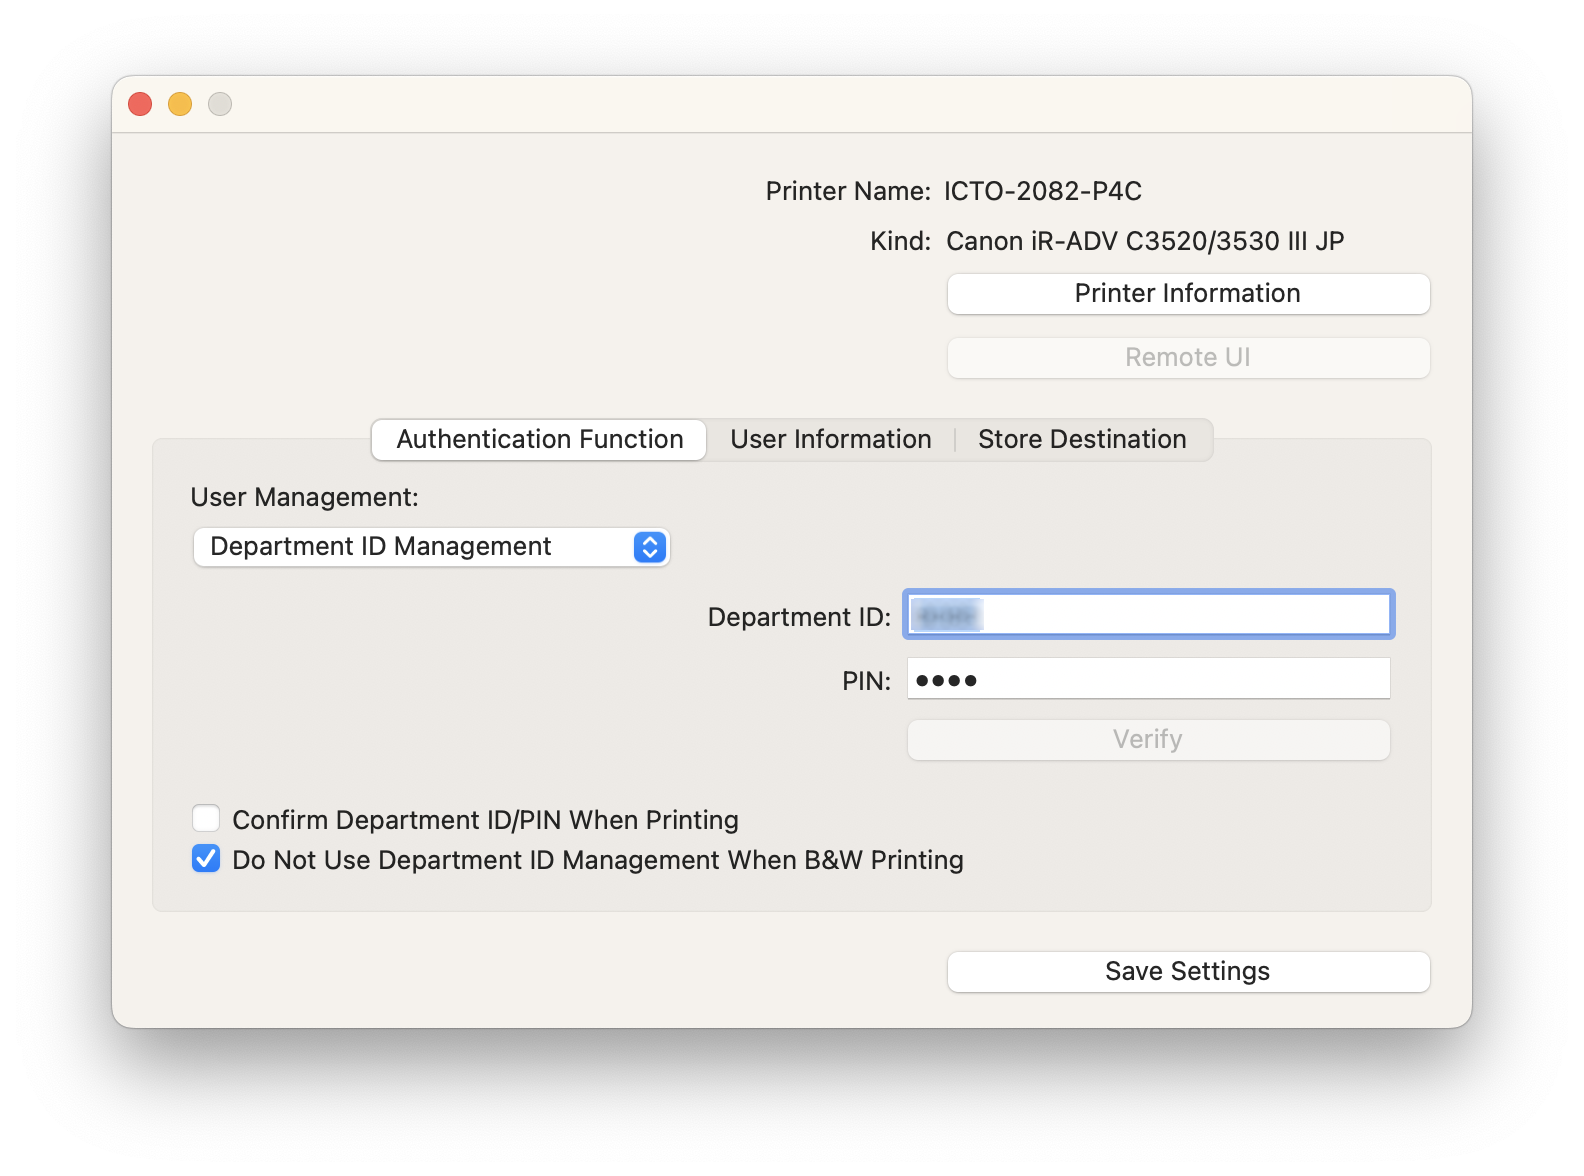
[Note: Please contact your department office to get your department id and department password for printing.]
1. Choose “Apple” menu > “System Settings“, then click “Printers & Scanners“.
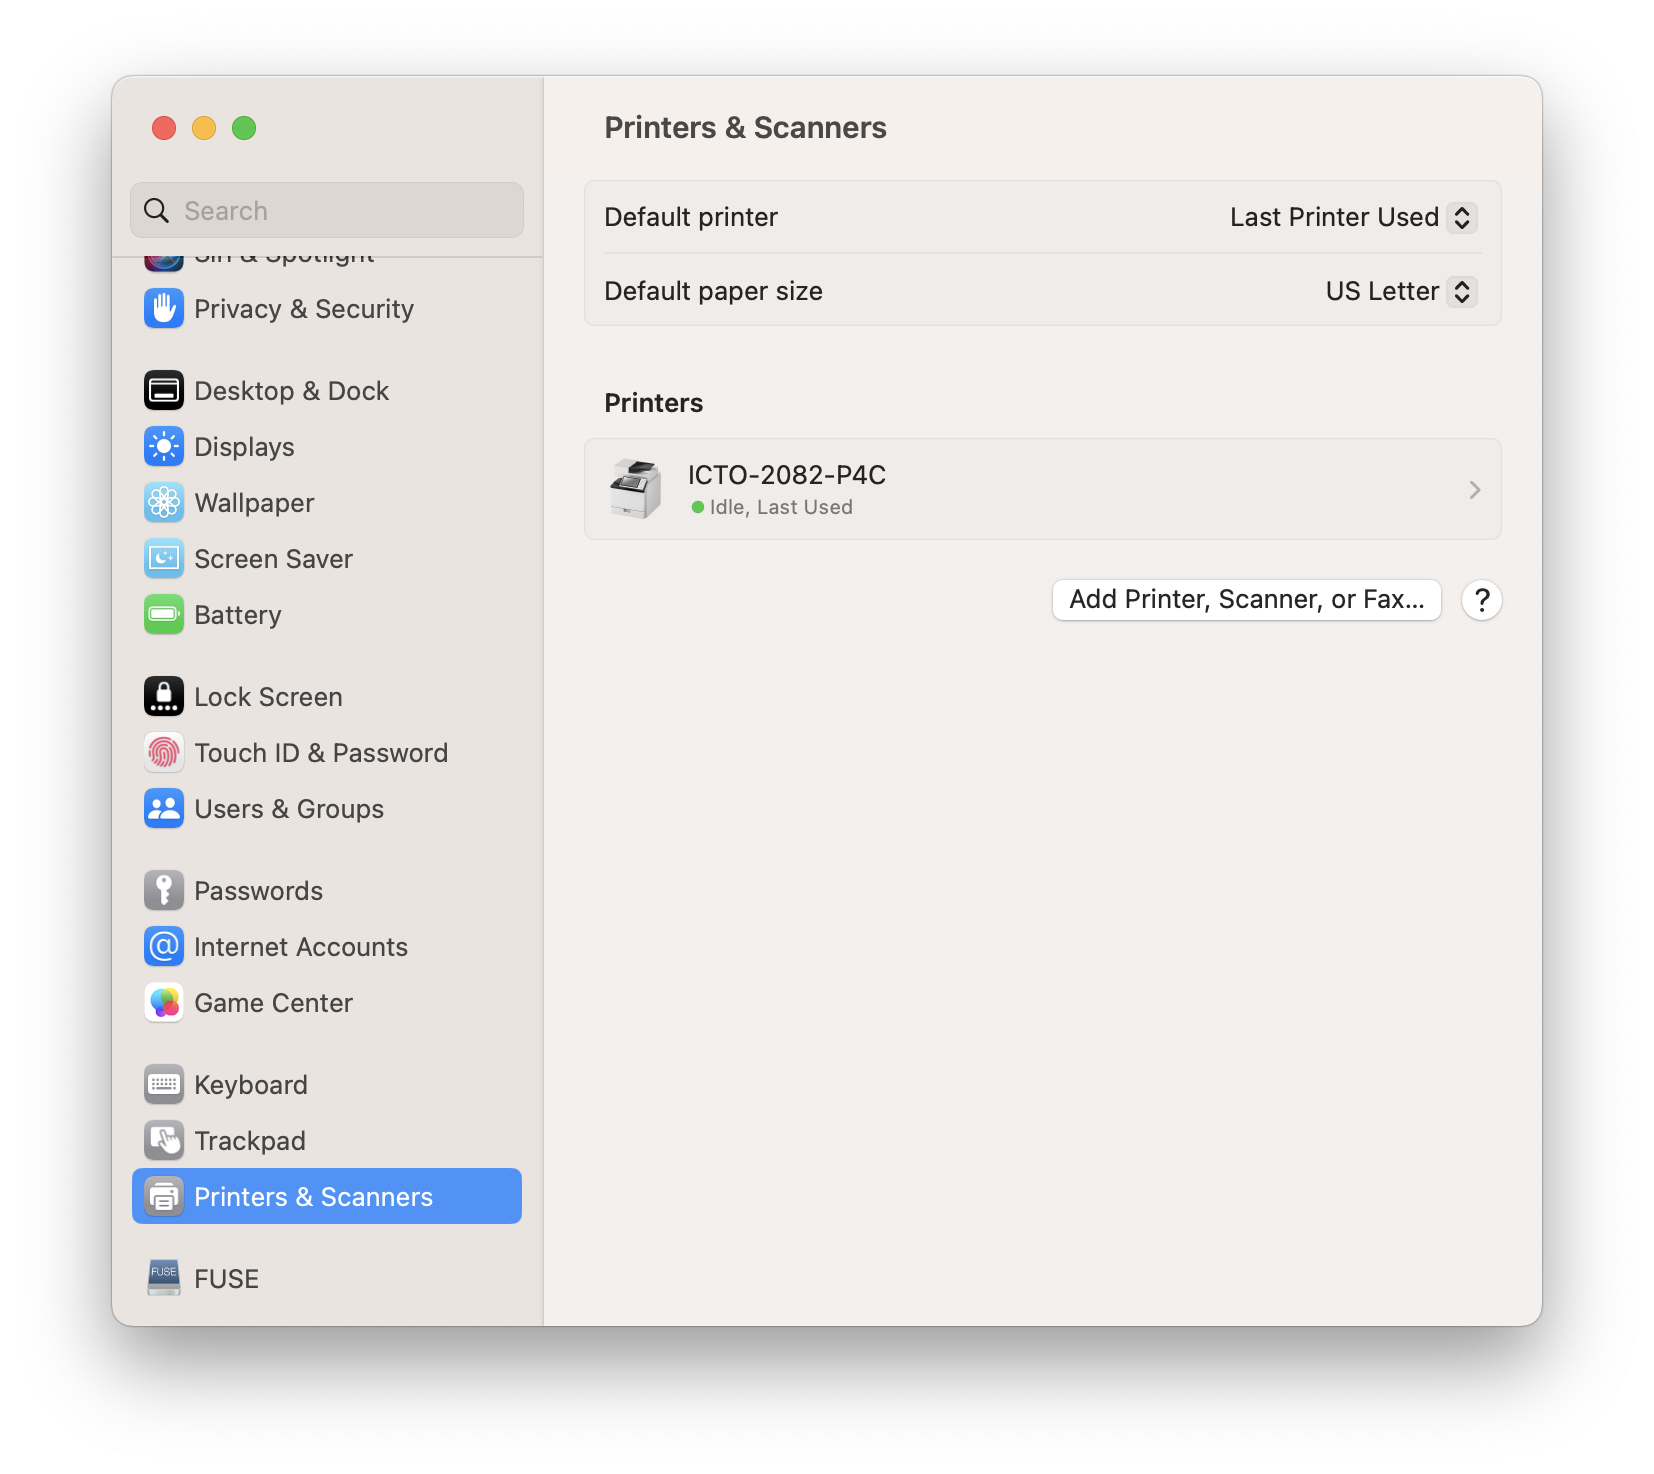
2. Click your print_queue_name and click “Options & Supplies…“.

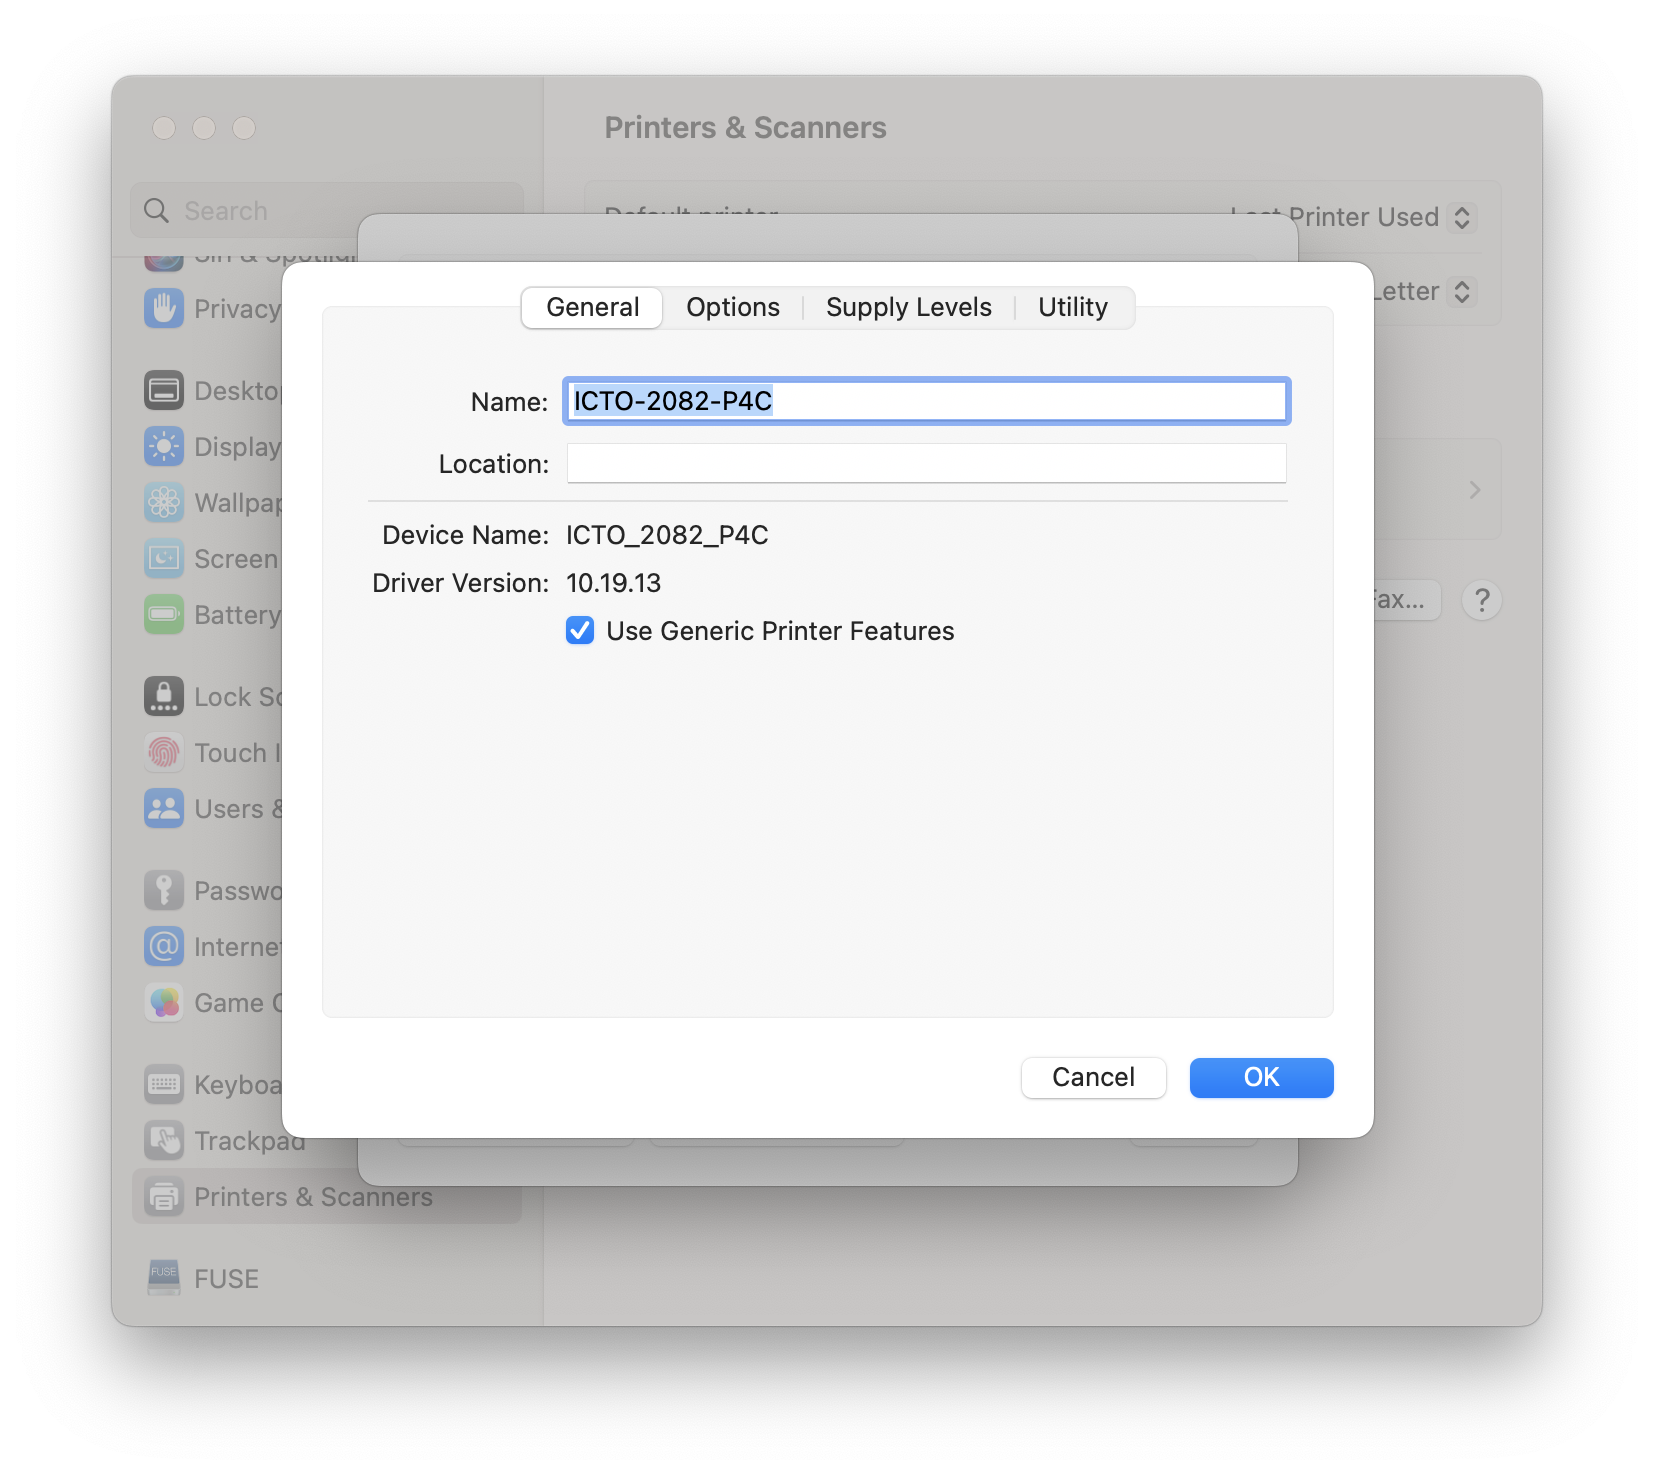
3. In the next window open the “General” tab and click on “Use Generic Printer Features“.
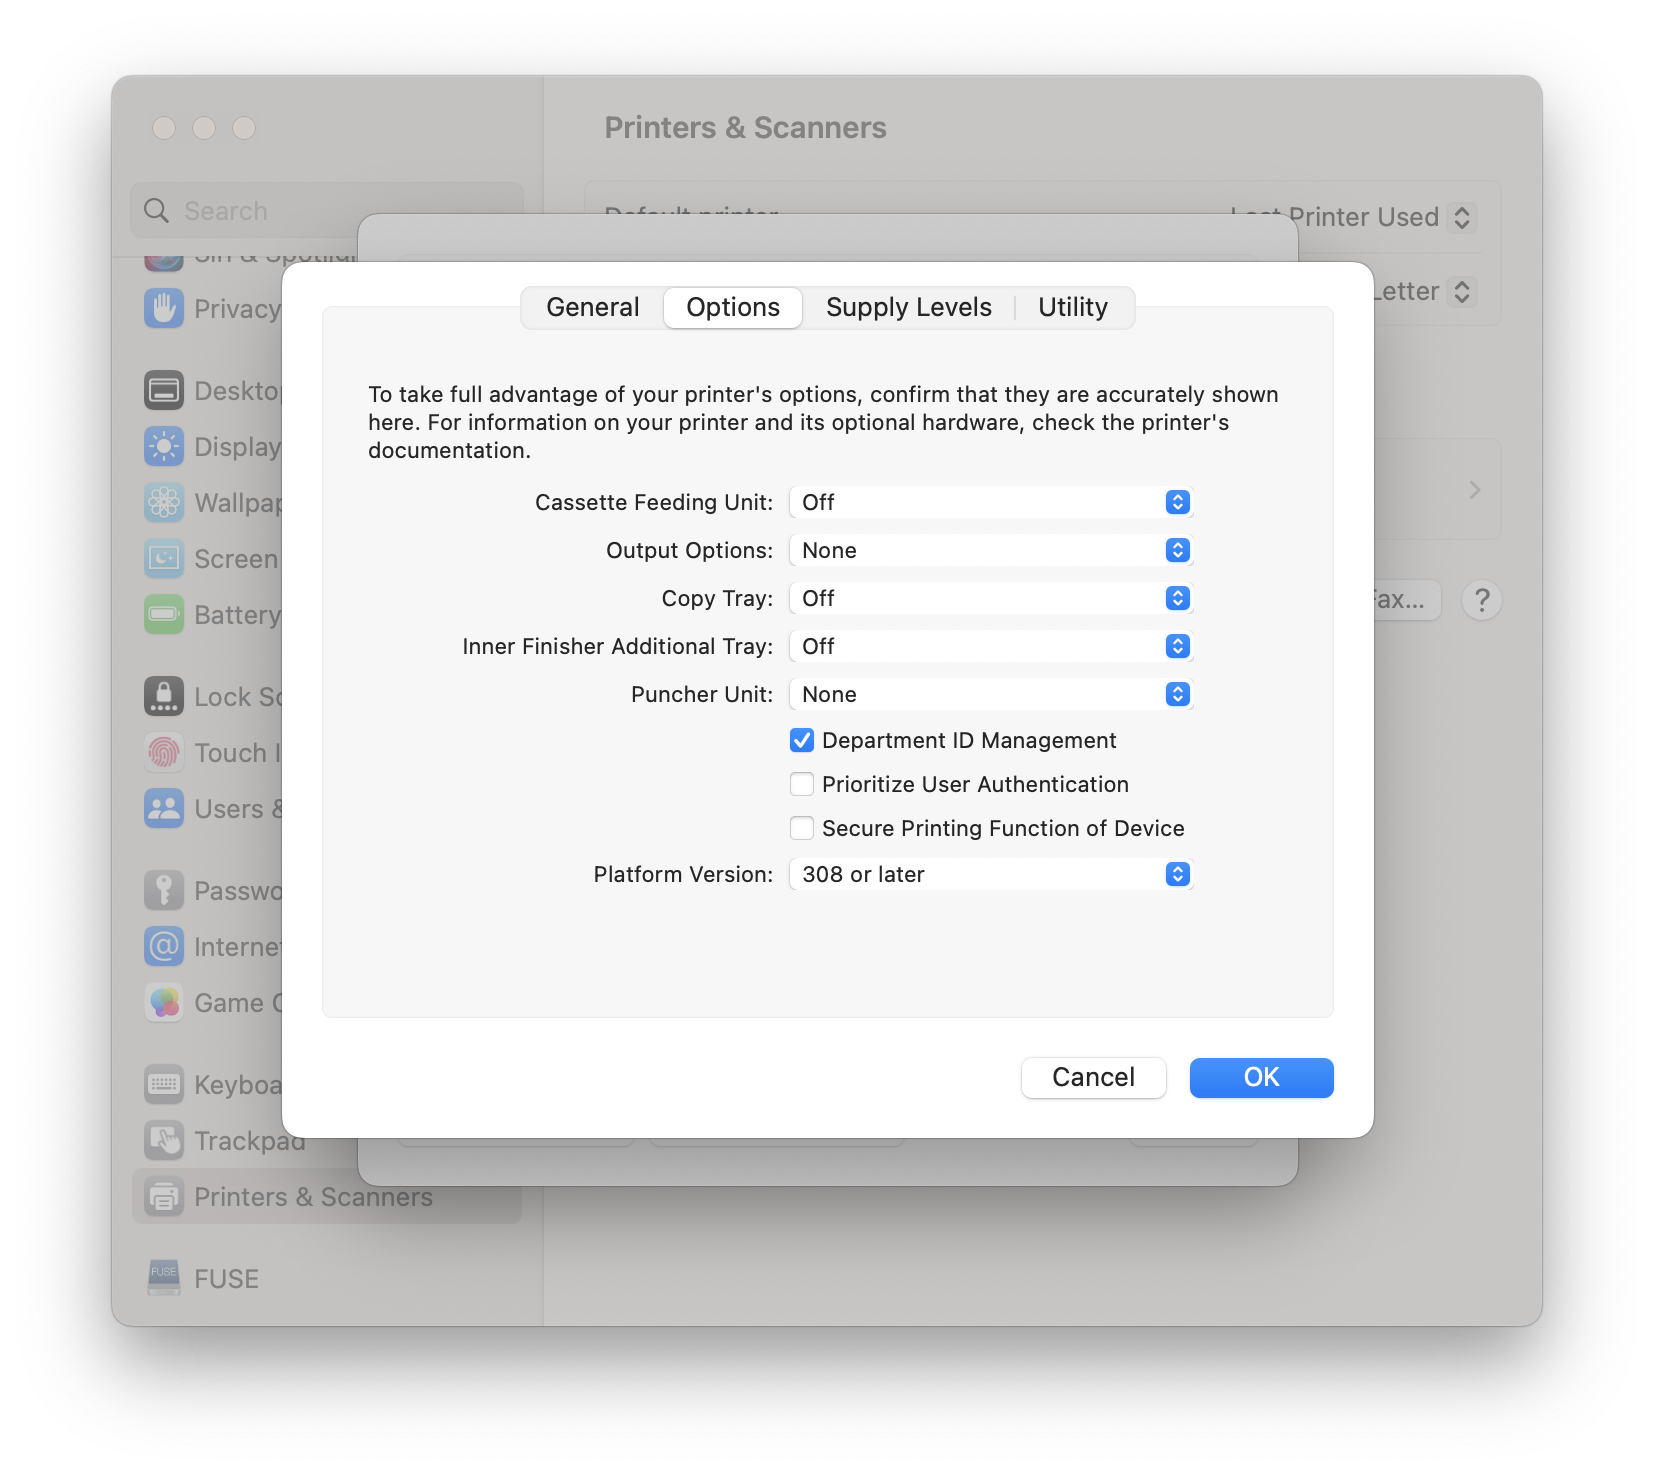
4. Now go to the “Options” tab and click on “Department ID Management“.
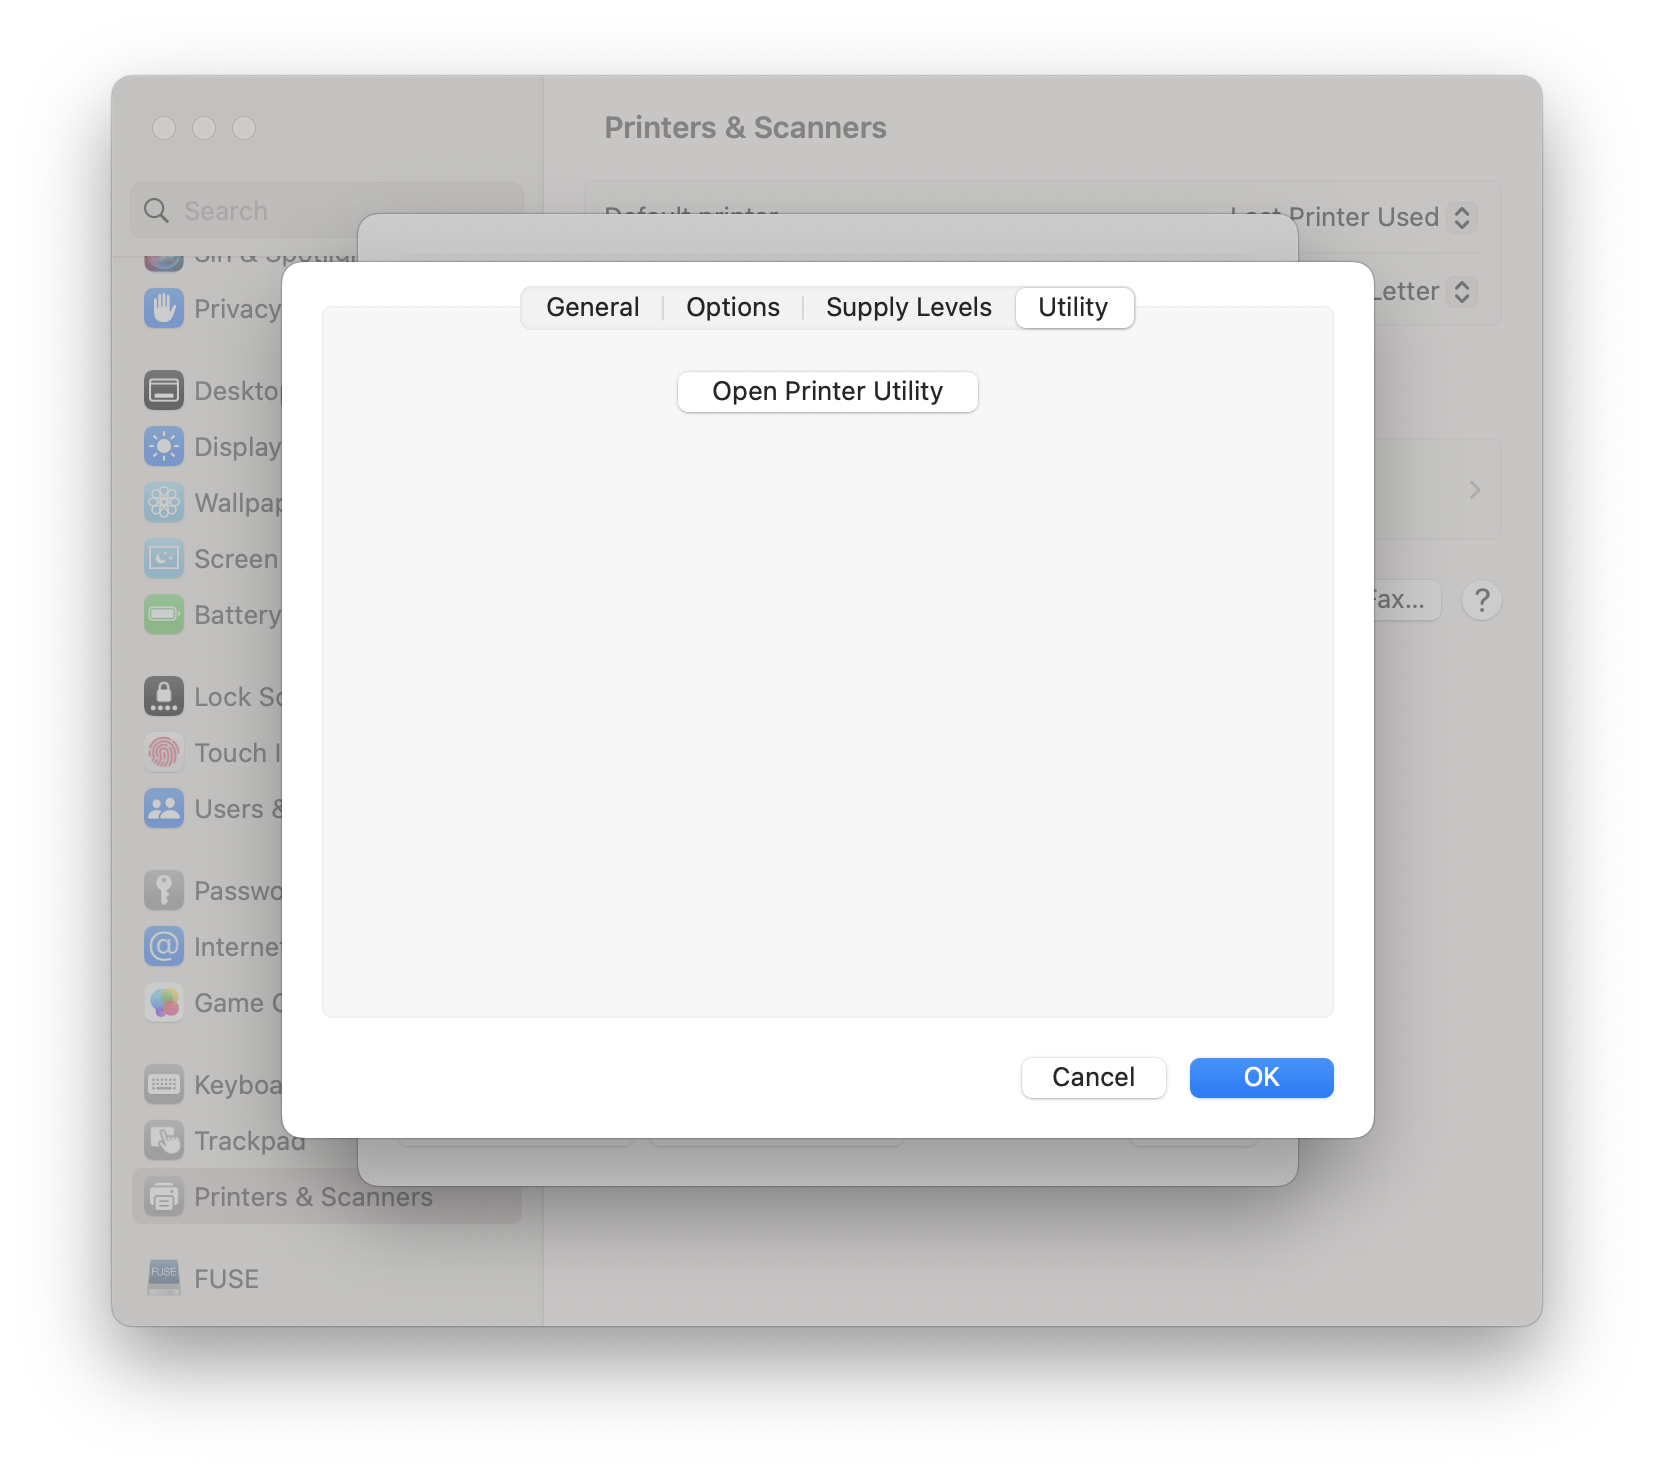
5. Now go to the “Utility” tab and click on “Open Printer Utility“.
6. Once in this dialog, choose “Department ID Management” in the pull down menu. Then enter the Department ID. If required, enter a PIN.