
Procedure of creating a share folder
Step 1: Create a folder under the folder N:\ShareFolder\Student\
Step 2: Enter the folder name. ICTO strongly recommend you to use your user ID as the folder name because it will be easier for you to find out the share folder.
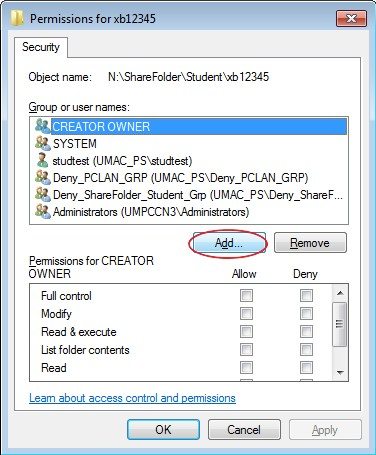
Step 3: Grant the user permission for the folder.
1) Right click and choose “Properties” on the folder which you want to grant permissions for other users.
2) Click on “Security” tag.
3) Click on the [Edit] button;

4) Click on the [Add] button.
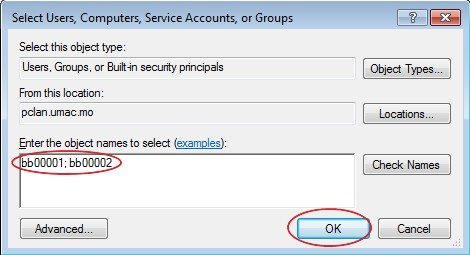
5) Enter the list of User ID that you want to grant permissions.
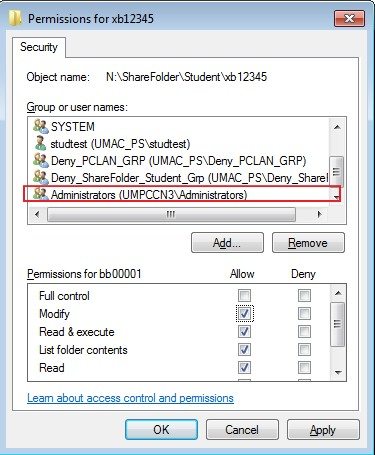
6) Grant permissions for each User ID of the list. You may grant the “Read Only Permission” or “Modify Permission”
Read Only Permission

Modify Permission

Remark: Please DON’T modify or remove the permissions of the “Administrators” or “CREATOR OWNER”. Otherwise, ICTO will NOT be able to provide any support on it.
At the end of June each year, ICTO will remove all files from folder N:\ShareFolder\Student\. Please remember to backup your data beforehand.